
Necessity is the mother of invention.
I have always loved that saying, because it is absolutely true. I procrastinate on occasion and I will not deny that; however, when faced with a need, I move fast.
I was packing for our trip to Guadalupe when I had a feeling that we would not need our underwater video lights or a strobe. The less I could pack the better and it dawned on me that we would not be at significant depth; meaning, the ambient light would be sufficient for photos and video. I emailed Cindy at Shark Diver, she said they discourage lighting and flash photography. The effect of video lighting and flash photography on the sharks is unknown, so they err on the side of caution. Less equipment to pack! Woo Hoo! It was a win win, but it also meant that we needed to adjust the equipment that we do have. Spending a little of the travel budget on more accessories was not exactly something I wanted to do, so I channeled my inner Diver MacGyver.
We have a nice little GoPro set up from Beneath the Surface; a mount, 2 extension arms, and 2 video lights. It breaks down for easy travel, but the problem is that the extension arms do not separate from the handles. We don’t need lights, so we don’t need the extension arms, but we do need handles. A quick YouTube search revealed a few promising DIY’s, but not quite what I was looking for. I headed to Lowe’s with the base piece in hand and a few ideas in my head. It took about 25 minutes of searching for the right configuration, but for less than $5 I was able to create the handles we needed. Functional, cheap, and travel friendly.
I thought I’d share this with you because it is cheap, quick, and easy! Honestly, it doesn’t look that bad! There is no need to spend a ton on a basic handle or base. I would recommend using stainless steel if you can find it. You could create a one handed mount, but I find that the stabilization is much better when you can utilize both hands. I’m still working on the art of neutral buoyancy, so any extra stability I can get is helpful! If you’re a big guy, you can adjust the following sizes to suit your needs. There are endless possibilities here. I am 5’7″ with medium to large hands, so I think this is a good average size. This is just a guide, change it up where you need to.
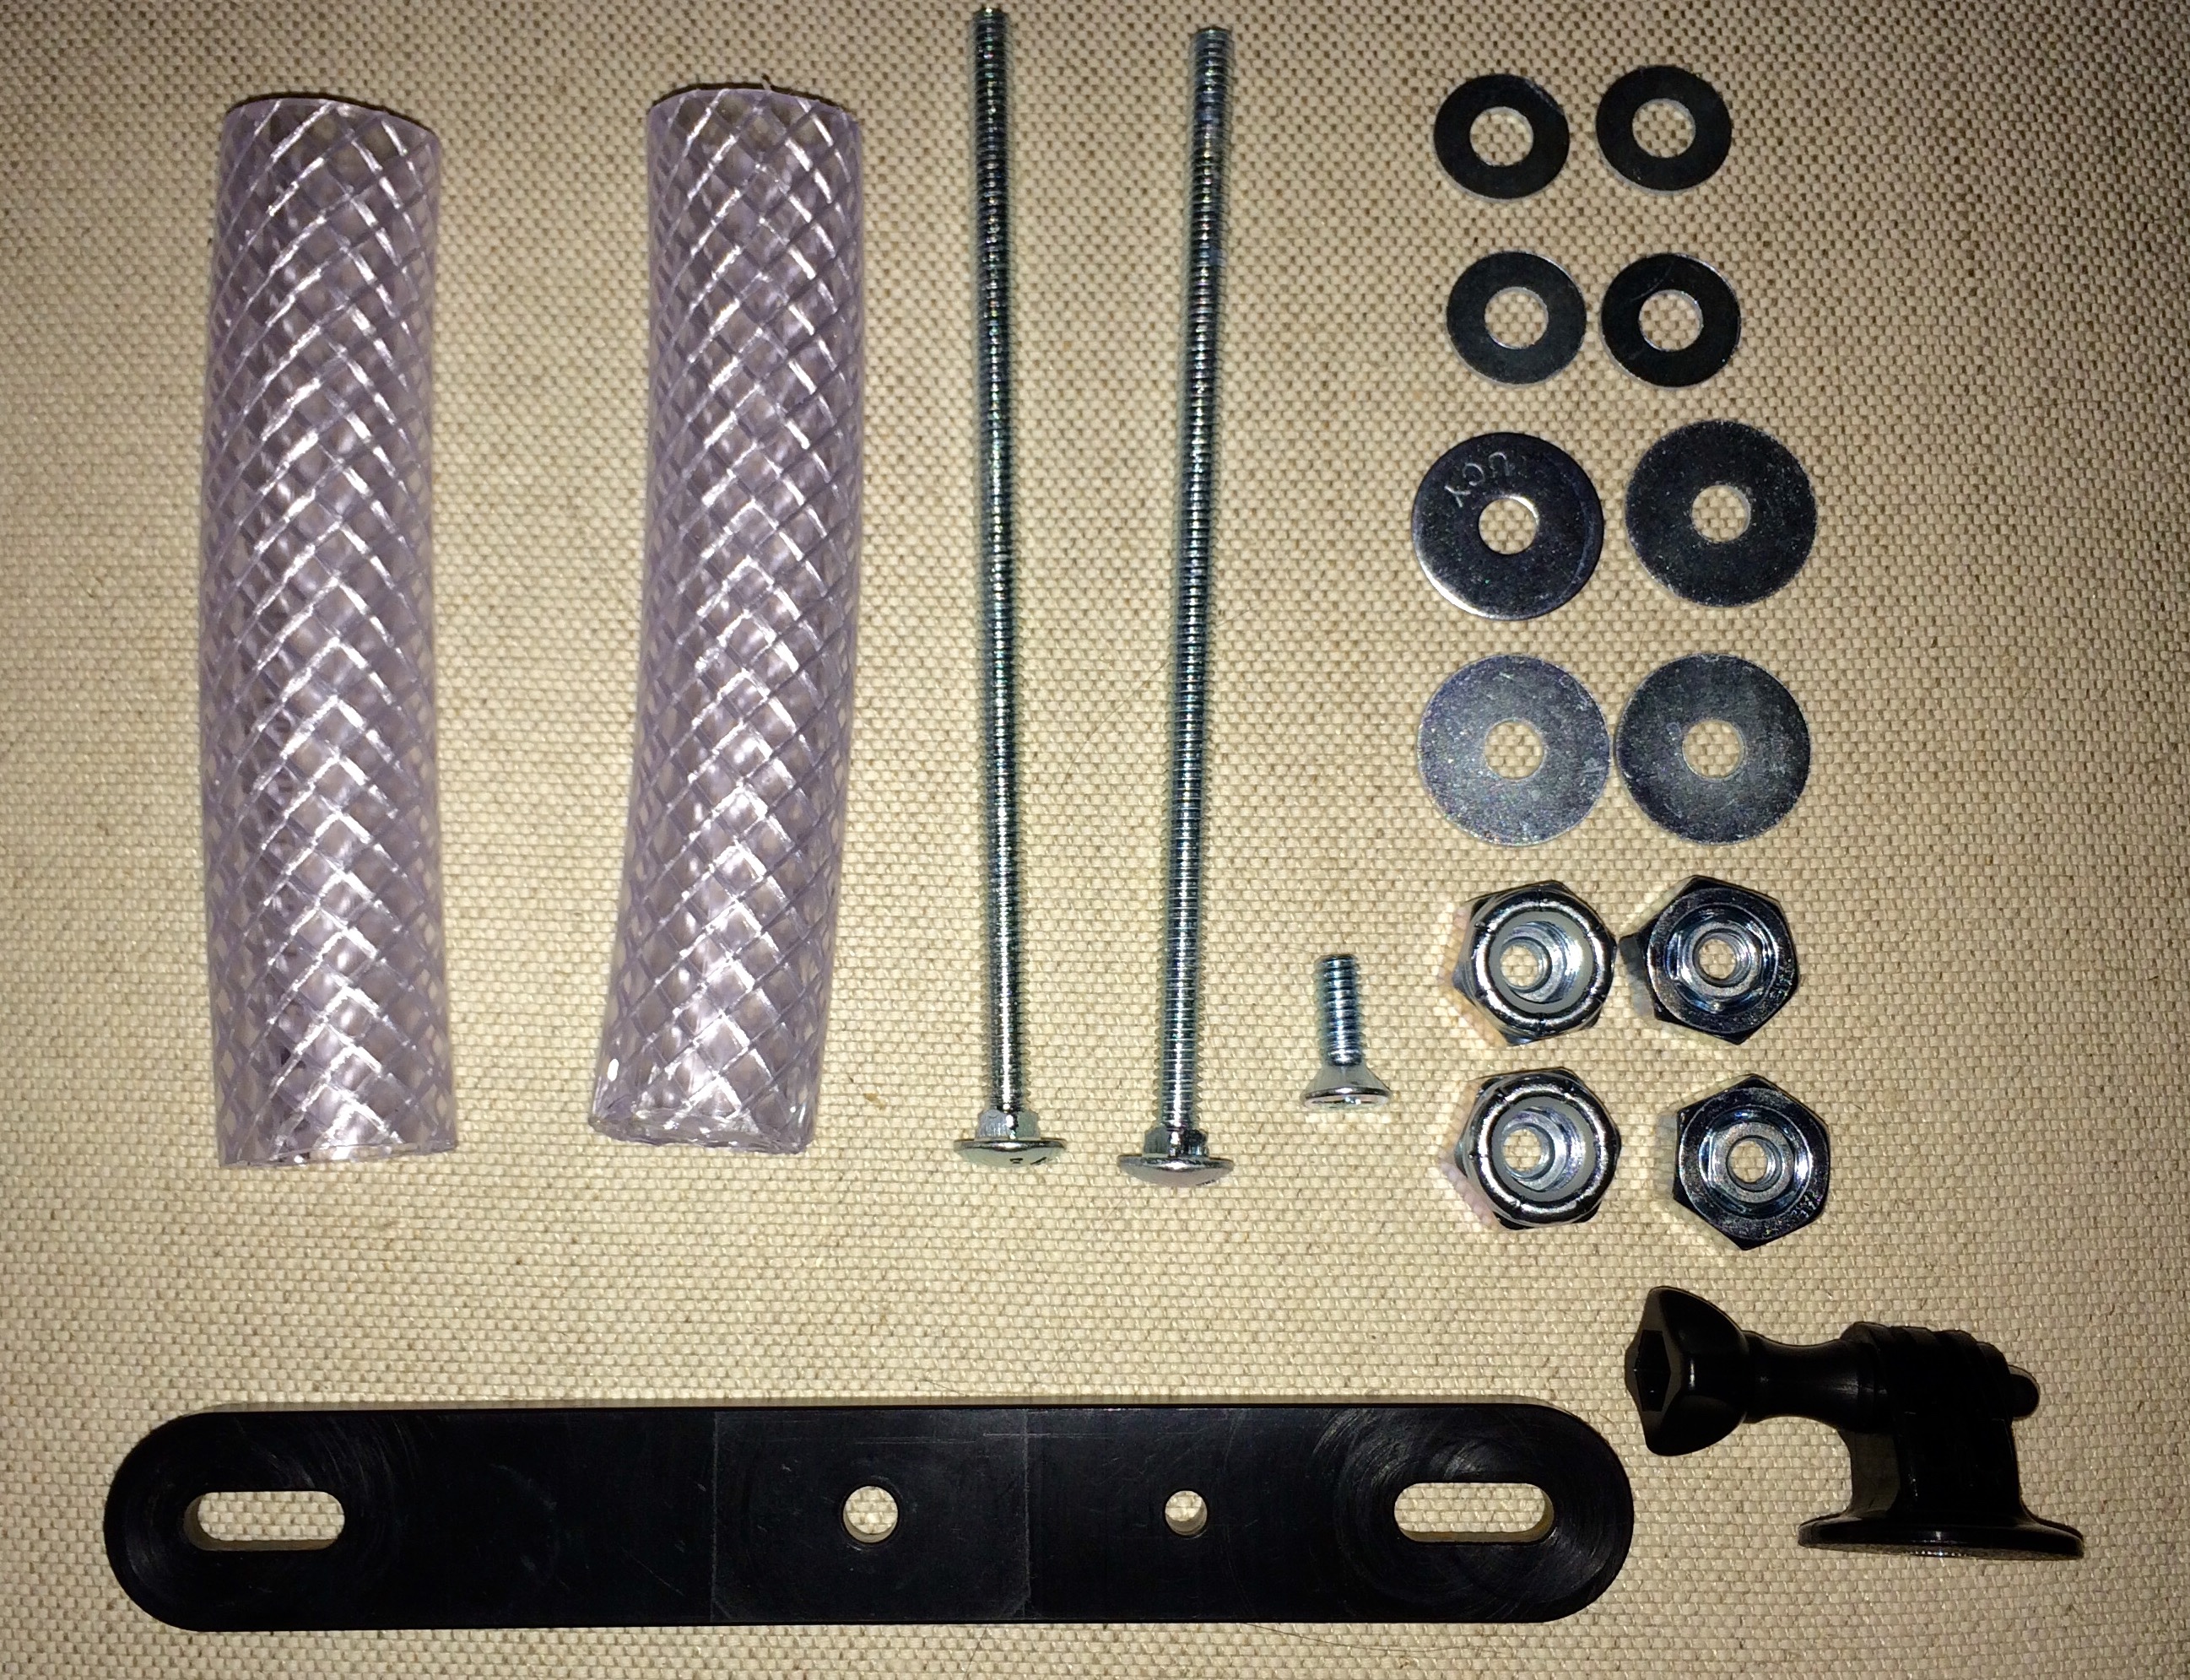
Here’s what you need.
- Base piece, 8″- 10″L x 2″ W. I already had one, but you could use a flat stainless steel bar and drill the holes where you want them.
- GoPro tripod mount and compatible screw.
- 2pc 6″-8″L bolts with 4 compatible nuts. 2 nuts per bolt.
- 2pc 6″-8″L plumbing tubes, width can be determined by hand size/comfort. I chose 1.5″. I had them cut at Lowe’s so I didn’t have to do it!
- 4pc washers to cover the ends of plumbing tubes. Match the size with what tube size you choose. I used 1.5″.
- 4pc small washers
- 2pc end nuts large enough to fit inside ends of plumbing tubes.
- 2pc regular nuts same size as #7
- Rubber mallet
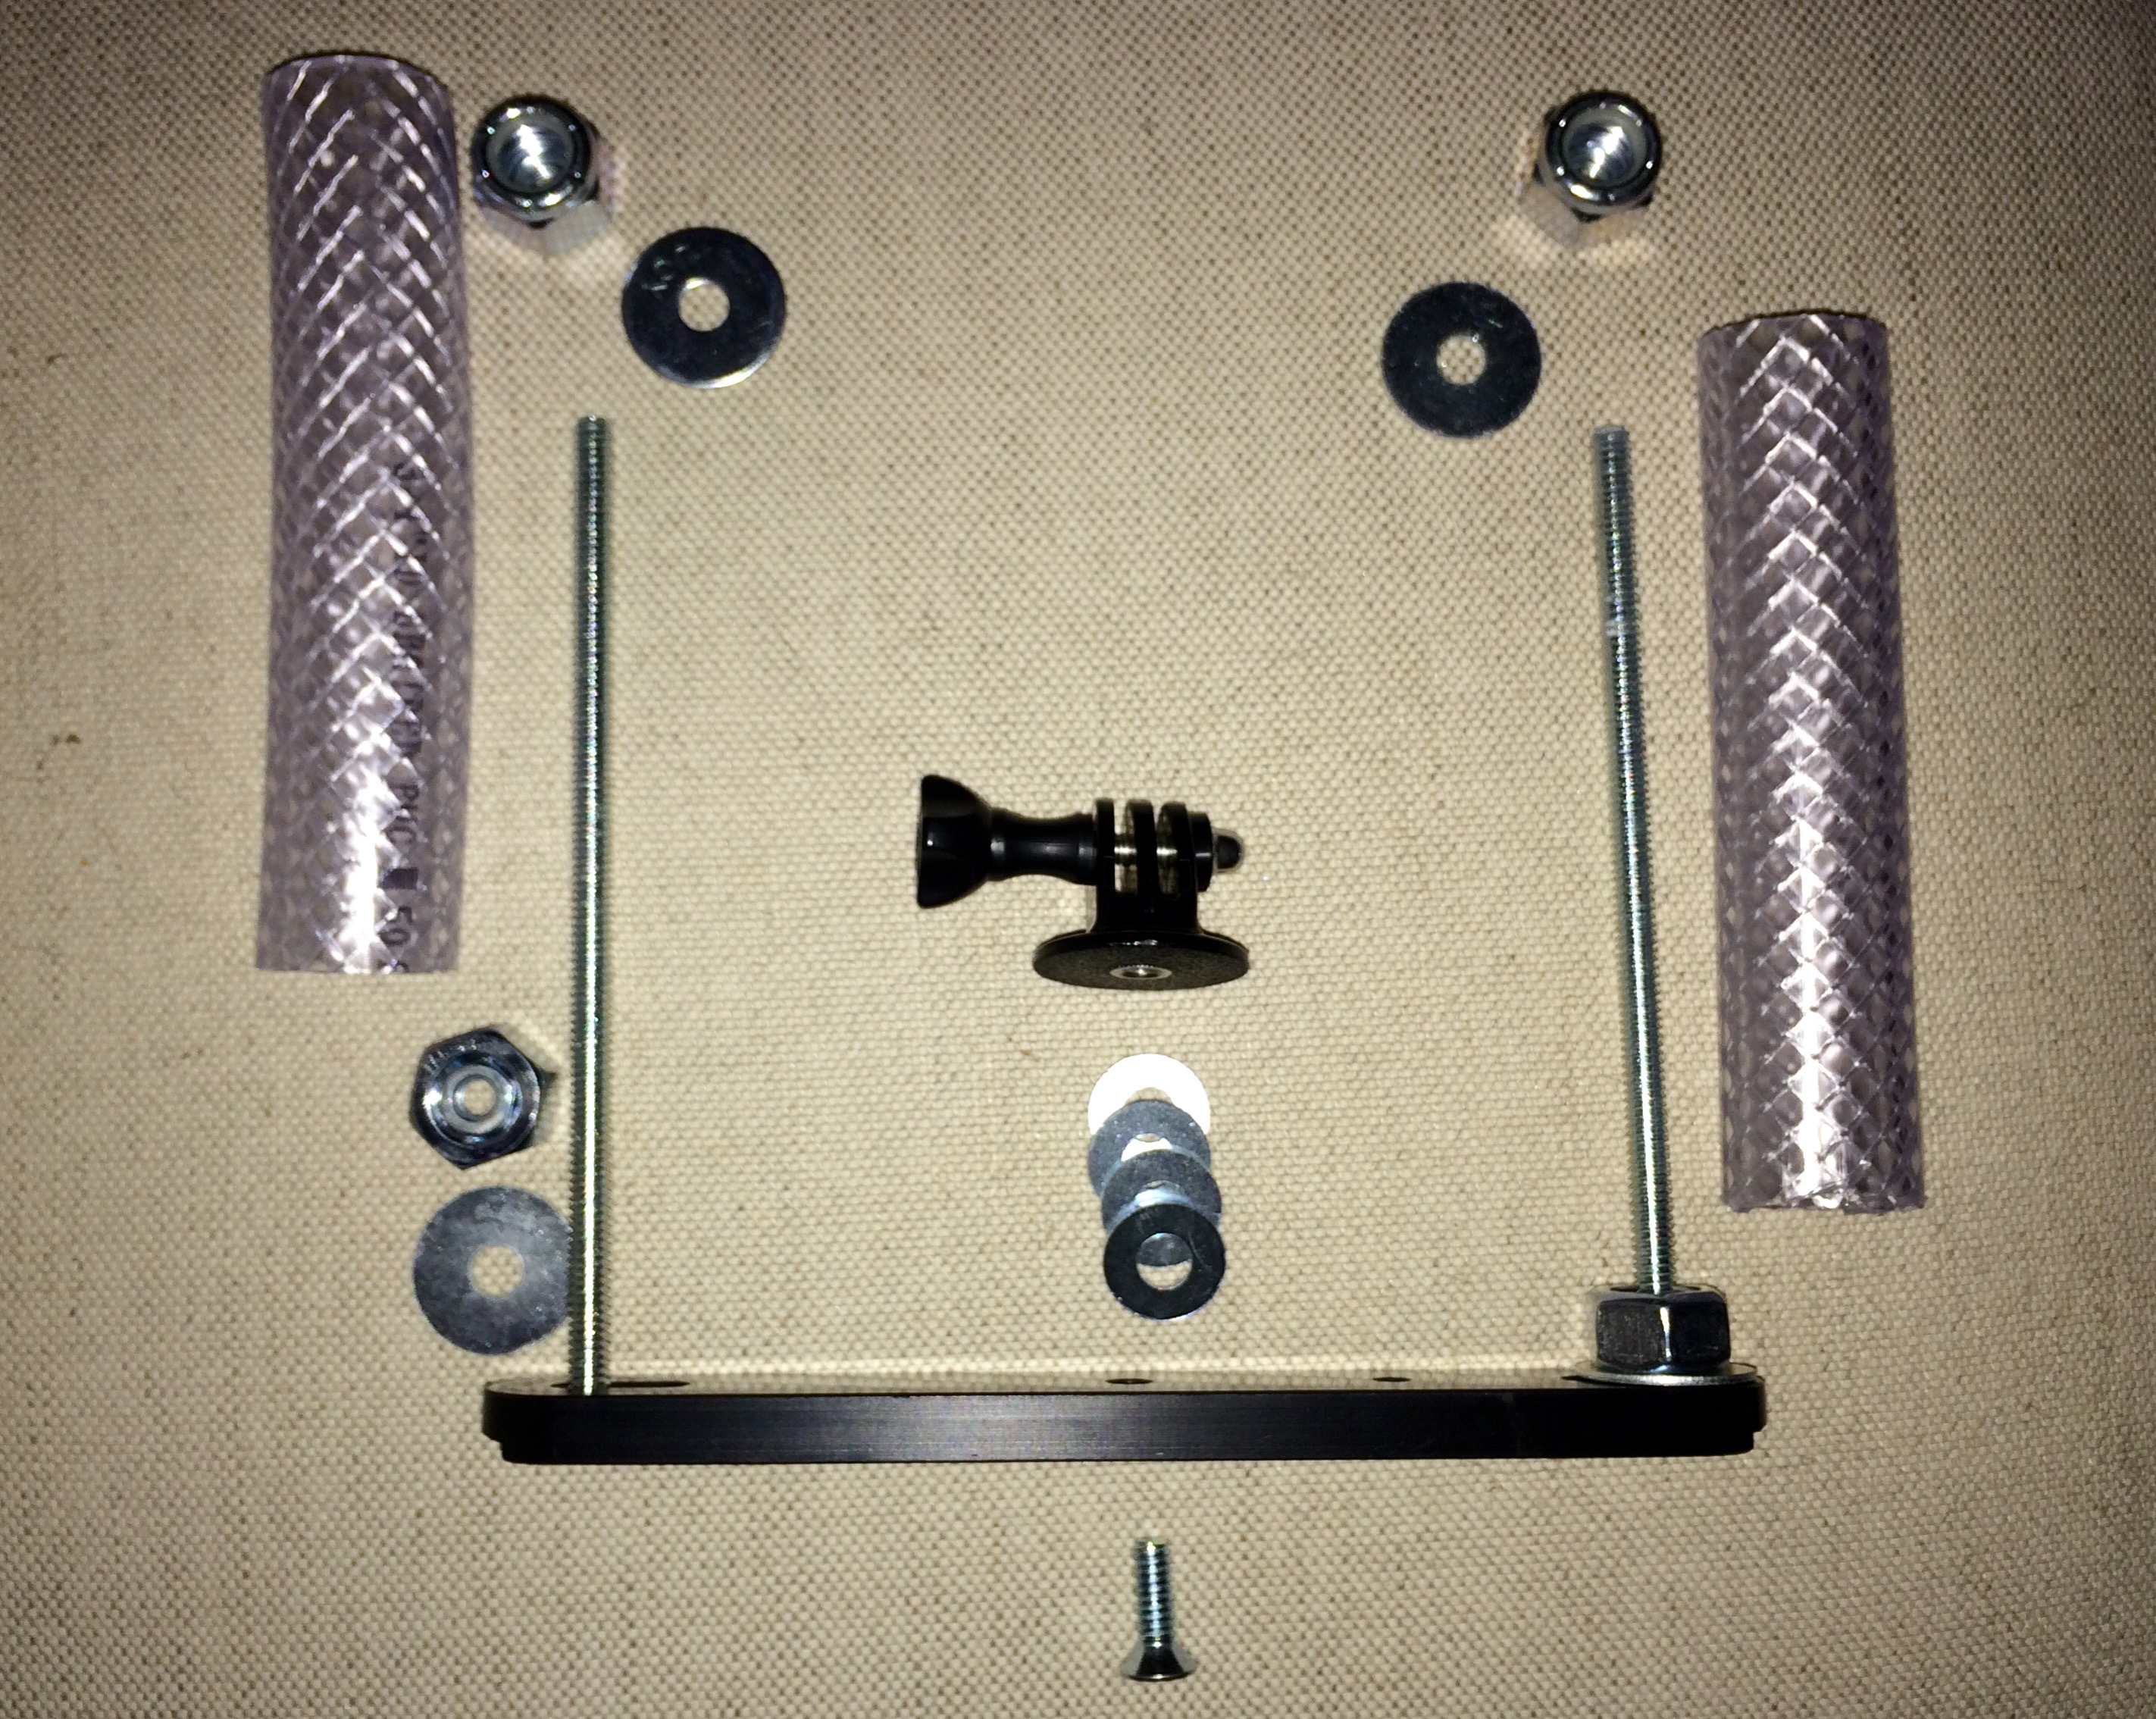
Assembly is a piece of cake.
- Drill holes in the base piece, one hole on each end and one in the center. You can customize it however you want.
- Feed the bolts through the holes at the ends of the base.
- Take the smaller nuts and place them on top of and in the center of the larger nuts. Give it a solid and even whack with the rubber mallet to secure them deep in the center of the larger nut. This is a trick I remember seeing my father use. I’m sure there is a name for it, but I can’t recall. I have some funny ones I’m considering, ha!
- Take the large washer and slide it down over the bolt. It will sit against the base.
- Take the regular large nut (now with the smaller nut on the inside) and tighten the bolt to the base.
- Place the plumbing tube over the bolt and situate the large nut into the base of the tube.
- Take the second large washer and place on top of the tube, covering the end. The bolt should be through the center of the washer.
- Use the end nut (now with the smaller nut inside) and secure it to the bolt. Tighten it down enough that the handles don’t move, but not so tight that you cannot undo them.
- Attach the GoPro mount to the center hole of the base. Use the smaller washers if needed to accommodate the length of your screw if it’s too long.
- Attach your GoPro!
DONE!
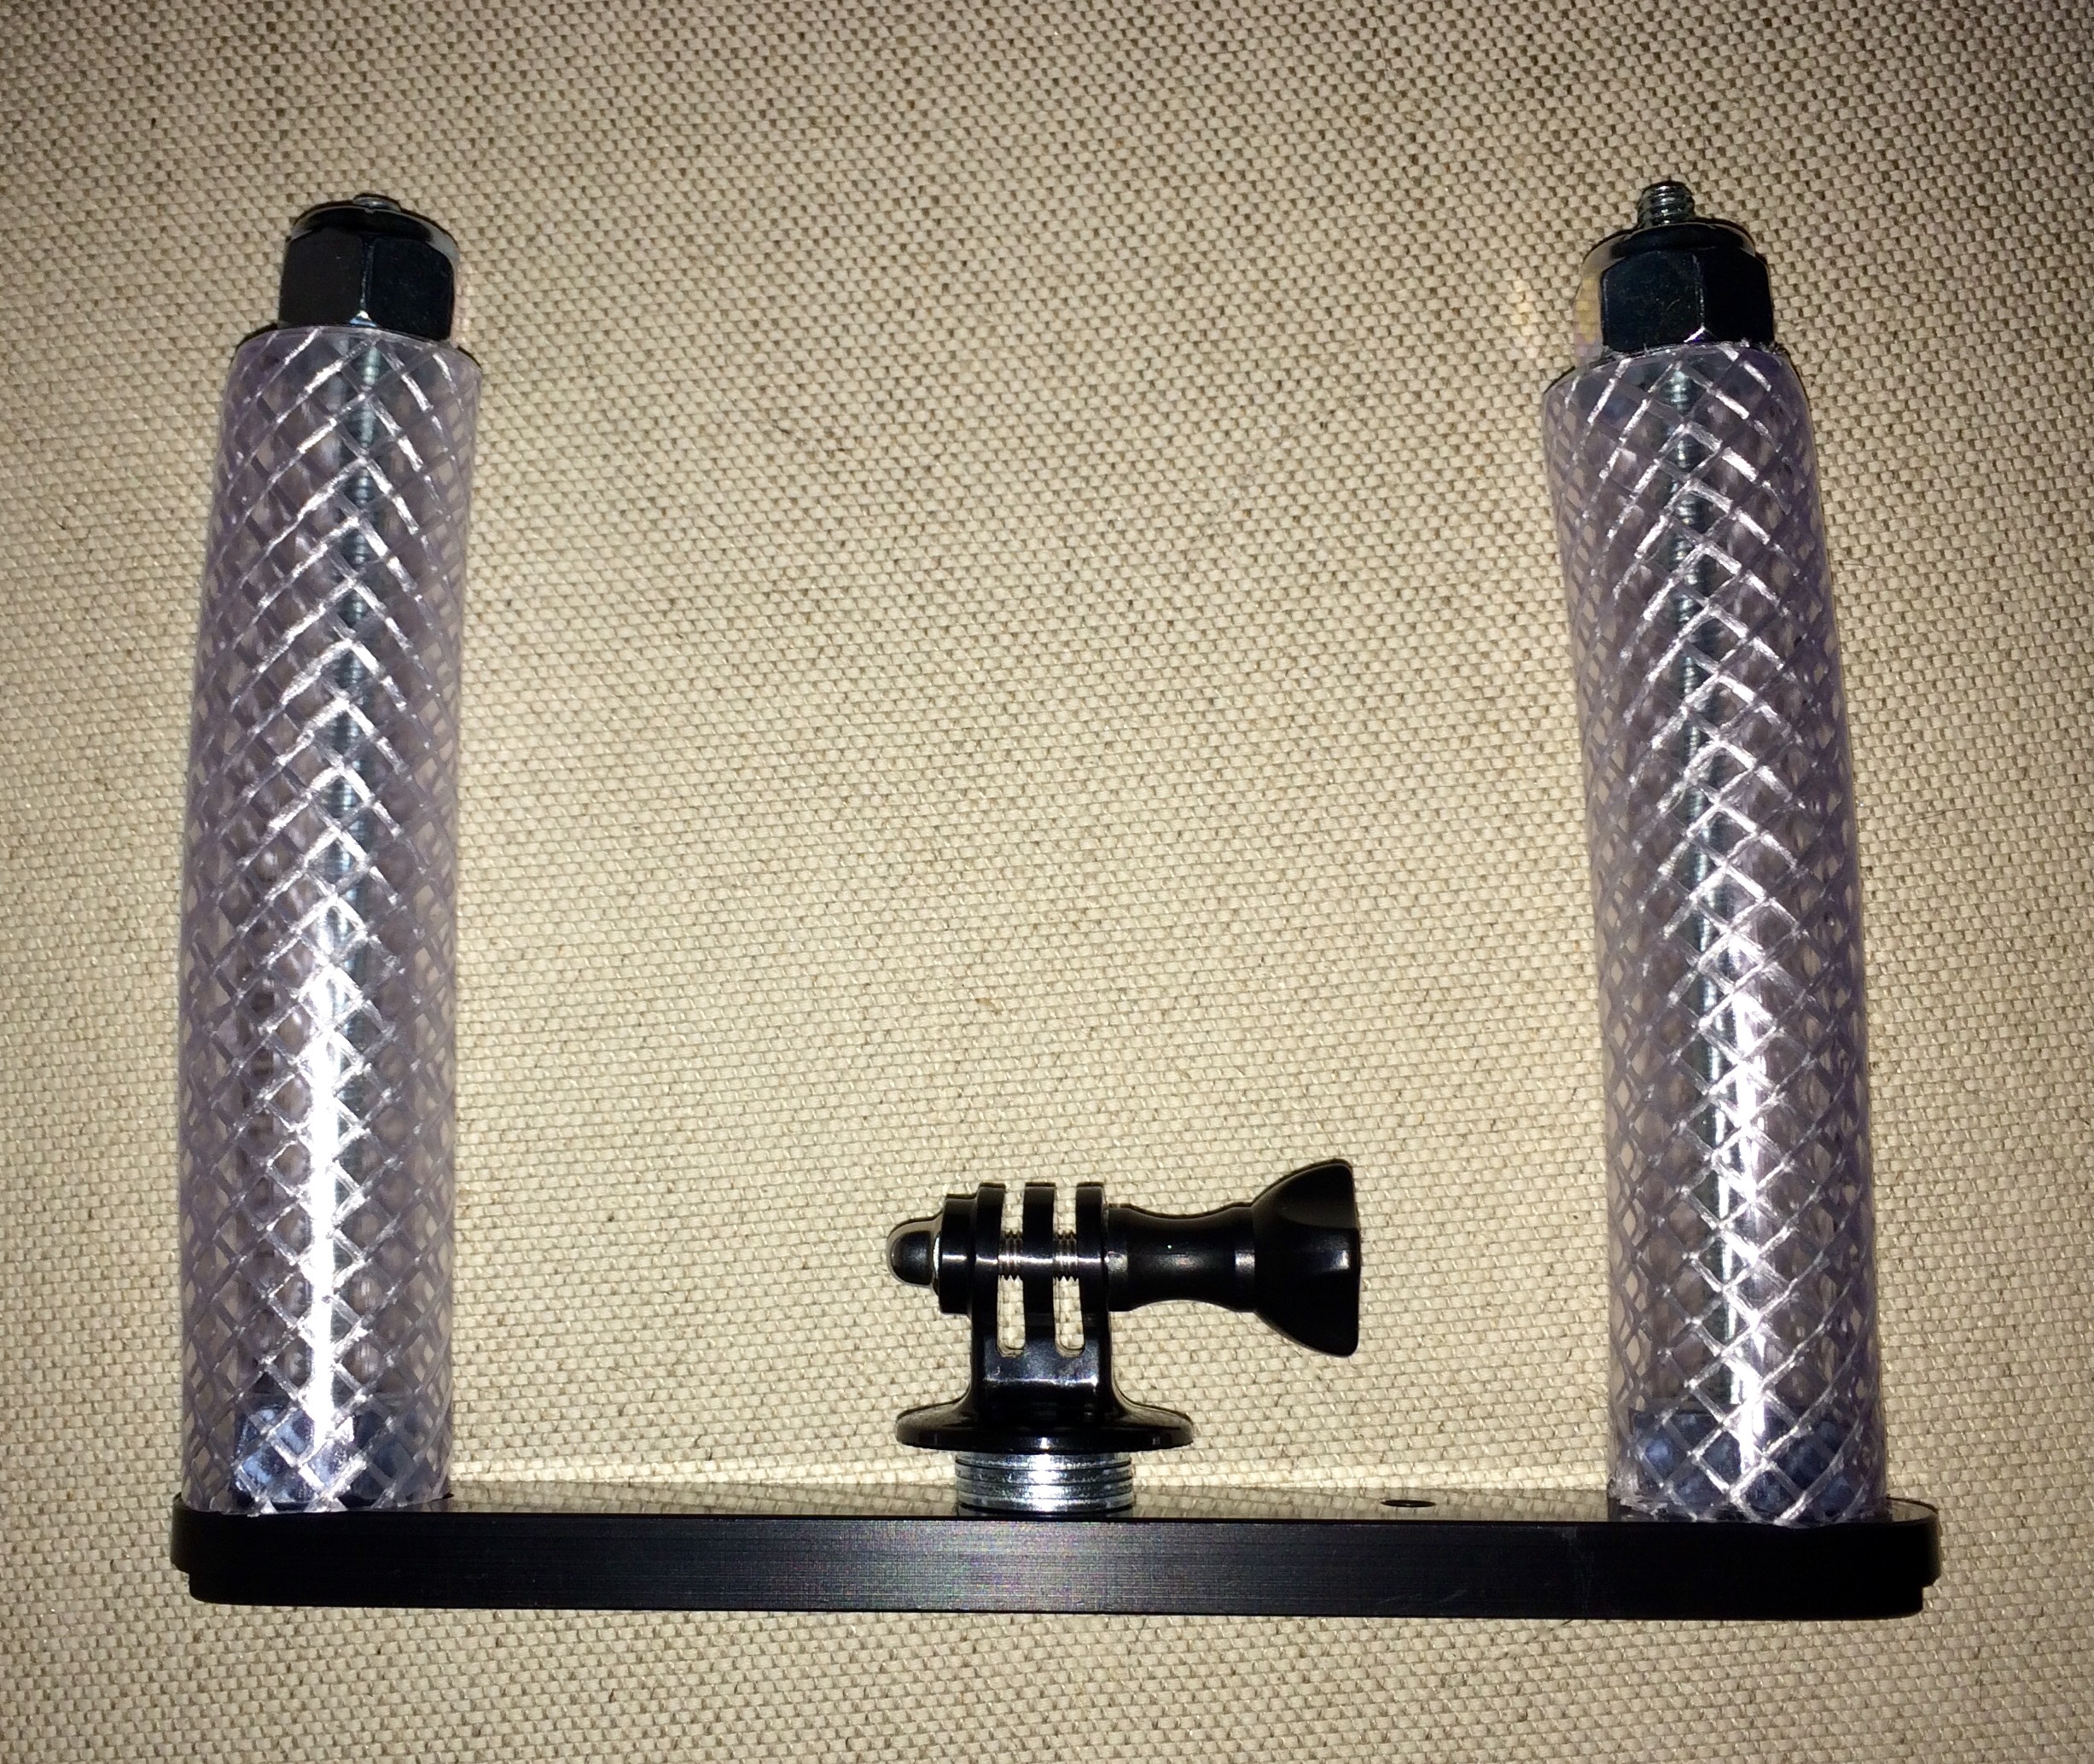
This little set up worked great! I used a few of the GoPro pivot arms to set the camera in front of my hands. I found that if I placed it directly on the base my fingers would occasionally appear in the video. You could design a boomerang shape base to correct that. Play with it, design your own.
Give it a good rinse in fresh water and towel dry after each use. I think it will last a long time. Martin grabbed a nice little pic of it in action! I guess you know what will be on our Christmas Cards now!

